Posts: 23
Threads: 5
Joined: Jul 2022
Reputation:
2
Gimp version:
Operating system(s): Windows Vista or 7, 8, 10 (64-bit)
Googling my question hasn't given me the answer so I'm wording it differently here.
I want to take a rectangular border.
Transform one by 90 degrees.
Have them meet in the corner.
But then I want the border to look like a border made into a frame.
In other words for those who sew I want it to look like the preview image for this video,
https://www.youtube.com/watch?v=o3twJCHAQfI
But of course with my digital border.
Does anyone know how to do this?
Thank you,
Angel
Posts: 6,942
Threads: 297
Joined: Oct 2016
Reputation:
605
Gimp version:
Operating system(s): Linux
08-18-2023, 08:01 AM
(This post was last modified: 08-18-2023, 08:04 AM by Ofnuts.)
- Align the two layers with a common corner (using guides will help)
- Use the free select tool to make a 45° selection that defines the angle to cut on the top layer.
- Starting from the corner (having guides help here also)
- Depress Ctrl for constrained angles and move to a second point in the diagonal (Ctrl will keep it exactly at 45°)
- Add a third point
- Go to the first point to close.
- Delete the triangle in the top layer with [Delete] or Edit ➤ Clear
Posts: 23
Threads: 5
Joined: Jul 2022
Reputation:
2
Gimp version:
Operating system(s): Windows Vista or 7, 8, 10 (64-bit)
 11-06-2023, 10:48 PM
(08-18-2023, 08:01 AM)Ofnuts Wrote:
- Align the two layers with a common corner (using guides will help)
- Use the free select tool to make a 45° selection that defines the angle to cut on the top layer.
- Starting from the corner (having guides help here also)
- Depress Ctrl for constrained angles and move to a second point in the diagonal (Ctrl will keep it exactly at 45°)
- Add a third point
- Go to the first point to close.
- Delete the triangle in the top layer with [Delete] or Edit ➤ Clear
I'm sorry it has taken me so long to acknowledge your response. I've had to deal with medical issues.
Thank you for such a quick and clear answer. 
Have a great day!
Posts: 1,063
Threads: 88
Joined: Aug 2018
Reputation:
83
Gimp version:
Operating system(s): Windows Vista or 7, 8, 10 (64-bit)
Another way:
Let's say you want the frame to have 8 different colored borders.
Then you create 8 empty layers, and from top to bottom you fill each color as follows:
With the top layer selected Select - All;
then, Select - Border, and enter the border value and finish with Edit - Fill With FG Color.
Having done the previous step, select the bottom layer and repeat the process, just double the border value.
In the third layer, the same thing, just triple the border value; quadruple it in the fourth layer and so on with each subsequent layer.
It is possible to speed up the process even more by keeping the 'Change Foreground Color' window open and choosing the color and dragging it to the created border selection, instead of using Edit - Fill With FG Color.
PS: Don't forget to merge the layers at the end of the process to form a single layer with all the edges
.....
Samj Portable - Gimp 2.10.28 - Win-10 /64.
Posts: 23
Threads: 5
Joined: Jul 2022
Reputation:
2
Gimp version:
Operating system(s): Windows Vista or 7, 8, 10 (64-bit)
(11-08-2023, 02:52 PM)Krikor Wrote: Another way:
Let's say you want the frame to have 8 different colored borders.
Then you create 8 empty layers, and from top to bottom you fill each color as follows:
With the top layer selected Select - All;
then, Select - Border, and enter the border value and finish with Edit - Fill With FG Color.
Having done the previous step, select the bottom layer and repeat the process, just double the border value.
In the third layer, the same thing, just triple the border value; quadruple it in the fourth layer and so on with each subsequent layer.
It is possible to speed up the process even more by keeping the 'Change Foreground Color' window open and choosing the color and dragging it to the created border selection, instead of using Edit - Fill With FG Color.
PS: Don't forget to merge the layers at the end of the process to form a single layer with all the edges
Hi Krikor,
I used some of these techniques for the area rug I just designed.
https://www.zazzle.com/z/ahbatl74?rf=238779749596324220
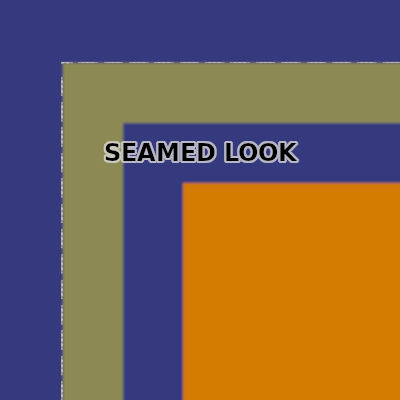
I was originally looking for the seamed look but I just realized I could insert a layer with a line to get that look although I don't know how to get a long dotted line look.
I noticed it says Samj Portable - Gimp 2.10.28 - Win-10 /64 at the end of your post.
Are you Samj?
Posts: 1,538
Threads: 71
Joined: May 2021
Reputation:
168
Gimp version:
Operating system(s): Linux
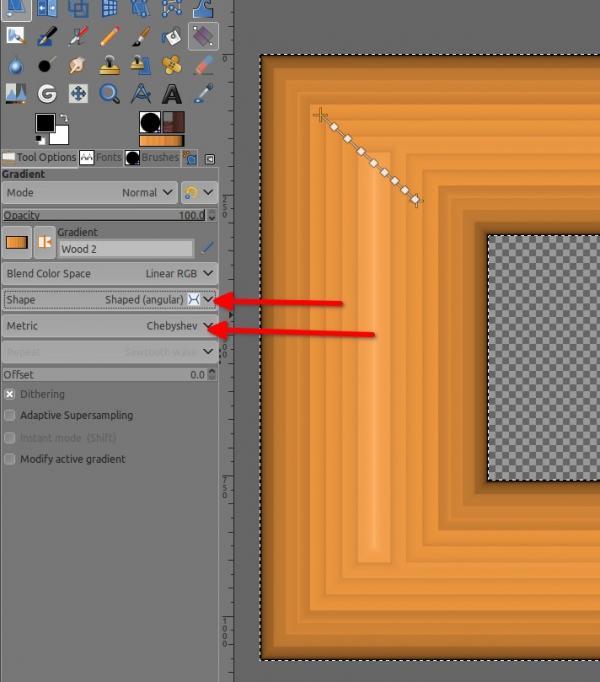
Another way is to use the gradient tool with Shape > Shaped and the Metric as Chebyshev

(11-09-2023, 12:31 AM)AngelH Wrote: I don't know how to get a long dotted line look.
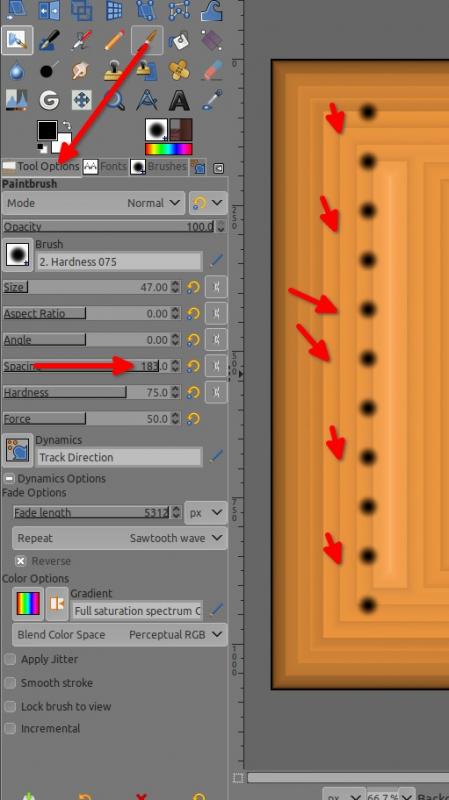
It's all about spacing in the brush setting, make your first dab with the brush, then hit the Shift key on your keyboard, while on the Shift key move your mouse and make a second dab, release the Shift key, you got a straight line of dots.

Patrice
Posts: 1,063
Threads: 88
Joined: Aug 2018
Reputation:
83
Gimp version:
Operating system(s): Windows Vista or 7, 8, 10 (64-bit)
(11-09-2023, 12:31 AM)AngelH Wrote: Hi Krikor,
I used some of these techniques for the area rug I just designed.
https://www.zazzle.com/z/ahbatl74?rf=238779749596324220
I was originally looking for the seamed look but I just realized I could insert a layer with a line to get that look although I don't know how to get a long dotted line look.
I noticed it says Samj Portable - Gimp 2.10.28 - Win-10 /64 at the end of your post.
Are you Samj?
Hi AngelH,
To create a stitched appearance on the rug you can use a brush.
Maybe by researching you will find a brush that is ideal for your project.
Or you could create a custom brush yourself.
With the brush selected, you can adjust the desired size and spacing and create the desired stroke. Much the same as explained in the previous post by PixLab.
The image below is just an illustration of the result obtained by tracing a brush.

The information contained in my signature in each post refers to information about the distro and version of my Gimp.
Samj (He or she? I never knew.) is the author of my version of Gimp that I use. (there are other authors of Gimp portable)
.....
Samj Portable - Gimp 2.10.28 - Win-10 /64.
Posts: 7,832
Threads: 166
Joined: Oct 2016
Reputation:
1,078
Gimp version:
Operating system(s): Linux
(11-09-2023, 02:02 PM)Krikor Wrote: Samj (He or she? I never knew.) is the author of my version of Gimp that I use. (there are other authors of Gimp portable)
both: Sylvie et Michel
Posts: 1,063
Threads: 88
Joined: Aug 2018
Reputation:
83
Gimp version:
Operating system(s): Windows Vista or 7, 8, 10 (64-bit)
(11-09-2023, 02:08 PM)rich2005 Wrote: (11-09-2023, 02:02 PM)Krikor Wrote: Samj (He or she? I never knew.) is the author of my version of Gimp that I use. (there are other authors of Gimp portable)
both: Sylvie et Michel
Ohhh... I didn't expect that one. ( For some reason I would guess it was a woman  )
Working in pairs is not only more productive but also more motivating.
rich2005 thanks for remedying my ignorance!
.....
Samj Portable - Gimp 2.10.28 - Win-10 /64.
Posts: 1,538
Threads: 71
Joined: May 2021
Reputation:
168
Gimp version:
Operating system(s): Linux
11-10-2023, 01:11 AM
(This post was last modified: 11-10-2023, 01:26 AM by PixLab.)
(11-09-2023, 03:05 PM)Krikor Wrote: (For some reason I would guess it was a woman  ) )
Maybe because she is the speaker of the house (sorry... but with what's happening actually in USA, I felt obliged to do that bad pun  )
Patrice
|


 )
) )
)