Not only success; but I have discovered the winning technique to create old style pixelized text.
... and it is a definitive share - thoroughly unforgettable!
I first entered the text, selected by colour, and the ran rich2005's suggestion Gaussion Blur @ 2.5, followed by PixLab's suggestion of Pixelize @ block 3.
In order to improve the viewed result, layer Opacity was set to 90%.
... and this seemed acceptable.
It was not a perfect match, but it was acceptable, given the context.
However, it was clear that in some contexts, the result would be out of place.
Serendipity then played her card.
I typed some much smaller text, and I noticed that it was already pixelated,
Hmmm!
What would happen, if I scaled up the text? (I had a hunch).
I ran the text through the above procedure. and gained a minor improvement.
Then the text was again selected by colour, and copied & pasted as a new image.
The image was then scaled up by 2, using the scale tool.
(I've not tried Image Scale yet, but I'm guessing it will produce similar results)
This produced a mass of pixelization.
The new resized text image, was then loaded as a layer into the original image, to provide a densely pixelated text, that is no longer jagged.
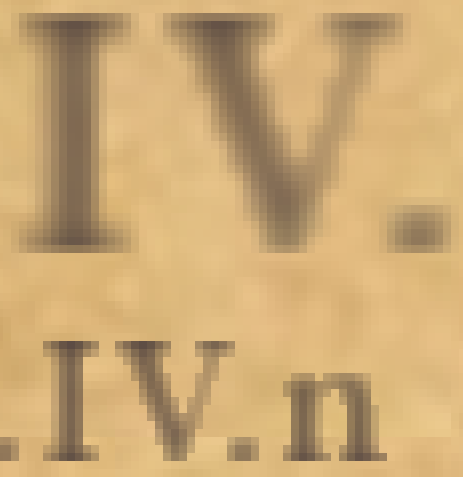
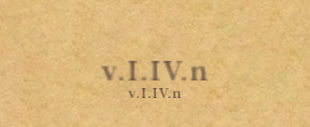
Here is the result:
Pixelized Text Zoomed:

Pixelized Text As Viewed:

There is plenty of room for further experimentation, but the basic rule is simple:
Create larger text from smaller text!
Nice & easy
Re Creating the Paper (to write on)
I sampled a selection of the original (avoiding blotches).
This was converted to offset tiles - both pattern, and large image.
The result was obviously not great - basically, squares of the sample.
The Heal tool was used to clear an area, allowing the tool to be increased in size.
The image was then first healed to remove the tile intersections, and then randomly healed again (to remove any semblance of a pattern).
That worked very nicely.
What I will do, is create a large image of the paper/background as a resource.
This will allow me, in the future, to grab a background size, as per requirements.
Overall, a great days work.
Hopefully, it will also help others
Thanks again to rich2005 and PixLab, for sharing their knowledge![[Image: thumbsup.png]](https://www.gimp-forum.net/images/icons/thumbsup.png)
... and it is a definitive share - thoroughly unforgettable!
I first entered the text, selected by colour, and the ran rich2005's suggestion Gaussion Blur @ 2.5, followed by PixLab's suggestion of Pixelize @ block 3.
In order to improve the viewed result, layer Opacity was set to 90%.
... and this seemed acceptable.
It was not a perfect match, but it was acceptable, given the context.
However, it was clear that in some contexts, the result would be out of place.
Serendipity then played her card.
I typed some much smaller text, and I noticed that it was already pixelated,
Hmmm!
What would happen, if I scaled up the text? (I had a hunch).
I ran the text through the above procedure. and gained a minor improvement.
Then the text was again selected by colour, and copied & pasted as a new image.
The image was then scaled up by 2, using the scale tool.
(I've not tried Image Scale yet, but I'm guessing it will produce similar results)
This produced a mass of pixelization.
The new resized text image, was then loaded as a layer into the original image, to provide a densely pixelated text, that is no longer jagged.
Here is the result:
Pixelized Text Zoomed:
Pixelized Text As Viewed:
There is plenty of room for further experimentation, but the basic rule is simple:
Create larger text from smaller text!
Nice & easy

Re Creating the Paper (to write on)
I sampled a selection of the original (avoiding blotches).
This was converted to offset tiles - both pattern, and large image.
The result was obviously not great - basically, squares of the sample.
The Heal tool was used to clear an area, allowing the tool to be increased in size.
The image was then first healed to remove the tile intersections, and then randomly healed again (to remove any semblance of a pattern).
That worked very nicely.
What I will do, is create a large image of the paper/background as a resource.
This will allow me, in the future, to grab a background size, as per requirements.
Overall, a great days work.
Hopefully, it will also help others

Thanks again to rich2005 and PixLab, for sharing their knowledge


