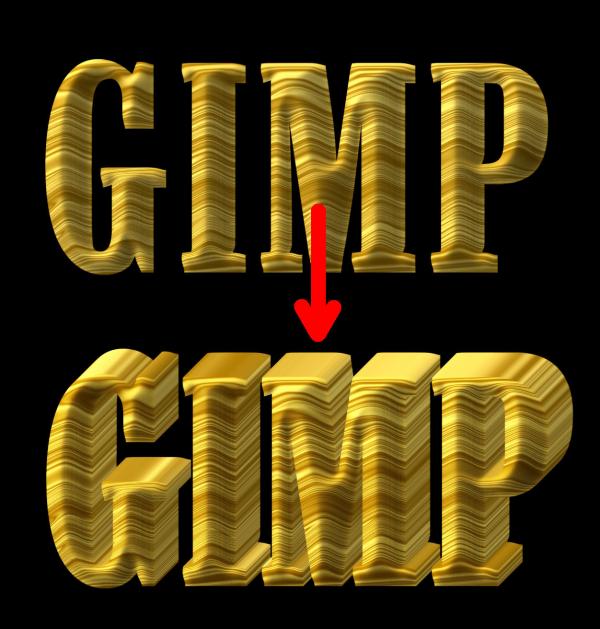
No script, no G'MIC, no plugin of any sort needed.
It's one of the easiest way and fast way, I can think. It has some limitation with angle, though... I often use this method for a fast, quick and not dirty way to do extrusion without "thinking".
Angle's limitation are every 45 degrees (8 angles)

!) Once you have prepared the face of your text you can start (for this exercise I just did some wooden text with a map (Bump and Displace)).
- On your decorated text layer ➤ Layer ➤ Crop to Content.
- Then duplicate that layer.
- Create a group and put that duplicated layer in it and keep it selected.
- Click on the duplicate layer button at the bottom of the layer stack as many time is needed, just keep in mind that 1 layer will be 1 pixel extrusion, thus 50 layers = 50 pixels extrusion (3D)

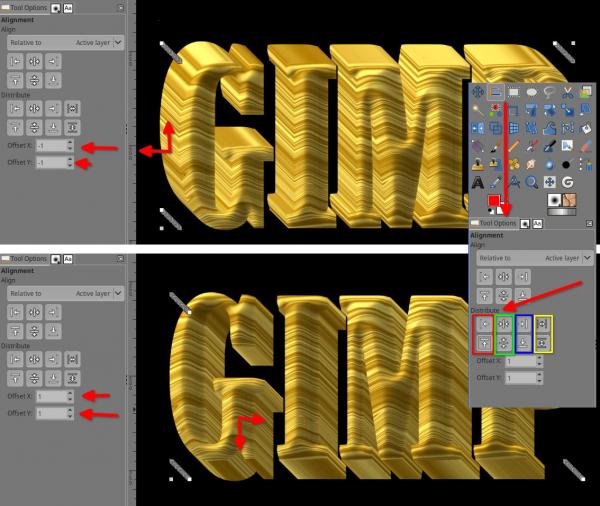
With the top layer selected (never select the group itself), select the Alignment tool In tool option use ➤ Relative to Active Layer
- Then select just a bit bigger than the layer size (use your mouse like you're using the rectangle selection tool), don't select the full image (remember the Crop to content we did earlier ).
).
Once select, 4 white squared dots will appear = selection success
Setting In the Distribute ➤ Offset X and Ywill be any combination of -1 to 1 (zero is included), then click on the 2 buttons of the Red or the 2 buttons on the Green square or the 2 buttons on the Blue square, BUT NOT the yellow square (example below)

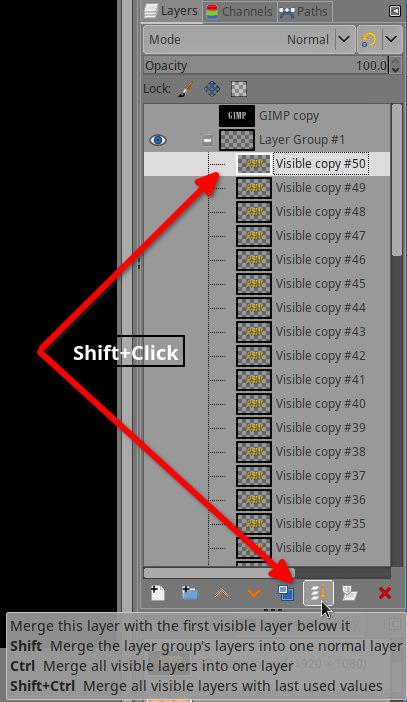
Once it's done, go to the layer stack AKA layer dialog, then at the bottom Shift + Click on the merge icon (with "Shift" it will merge the full group as 1 layer)

Tips:

It's one of the easiest way and fast way, I can think. It has some limitation with angle, though... I often use this method for a fast, quick and not dirty way to do extrusion without "thinking".
Angle's limitation are every 45 degrees (8 angles)
!) Once you have prepared the face of your text you can start (for this exercise I just did some wooden text with a map (Bump and Displace)).
- On your decorated text layer ➤ Layer ➤ Crop to Content.
- Then duplicate that layer.
- Create a group and put that duplicated layer in it and keep it selected.
- Click on the duplicate layer button at the bottom of the layer stack as many time is needed, just keep in mind that 1 layer will be 1 pixel extrusion, thus 50 layers = 50 pixels extrusion (3D)
With the top layer selected (never select the group itself), select the Alignment tool
 In tool option use ➤ Relative to Active Layer
- Then select just a bit bigger than the layer size (use your mouse like you're using the rectangle selection tool), don't select the full image (remember the Crop to content we did earlier
 ).
).Once select, 4 white squared dots will appear = selection success
Setting In the Distribute ➤ Offset X and Ywill be any combination of -1 to 1 (zero is included), then click on the 2 buttons of the Red or the 2 buttons on the Green square or the 2 buttons on the Blue square, BUT NOT the yellow square (example below)
Once it's done, go to the layer stack AKA layer dialog, then at the bottom Shift + Click on the merge icon (with "Shift" it will merge the full group as 1 layer)
Tips:
- Once it's merged down you can duplicate the layer to make the extrusion twice the size.
- Input 2 or -2 in the Offset X Y to get a more rough extrusion (stone text for example)
- You can use a mix of the R-G-B buttons, for example the Left side red button with the Bottom blue button (over and wait a second on a button to know which from layer's side it will align, in the end for this very specific extrusion we don't really care.
- If you Ctrl+Z during your test, before to click again on the buttons of Distribute, Just re-select the layer if there is no response to the Alignment.
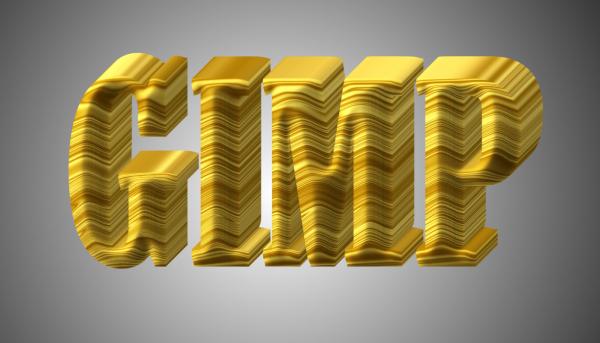
- Remember your first layer, the original one?, put it on top in the layer stack and play with the curves Colors ➤ Curves... to give it a slight more light or darker, to give the extrusion a "shadowy" or "brighter" effect, like below (it's very slight)
- Last not but least ➤ https://docs.gimp.org/2.10/en/gimp-tool-align.html


