The red border is just a visual reference in GIMP, it's not printed nor visible on an image like jpg/tiff/png/webp/gif etc...
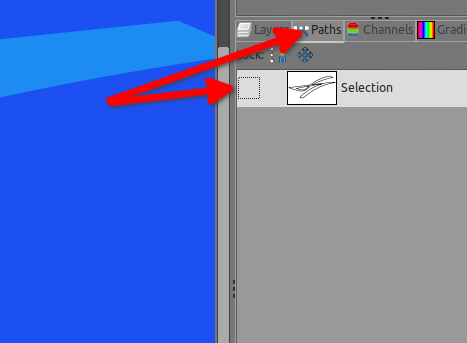
To remove it go to the Path tab (usually beside the layer tab) and untick the eye (once it's done, don't forget to click back on the layer tab to have it in focus)

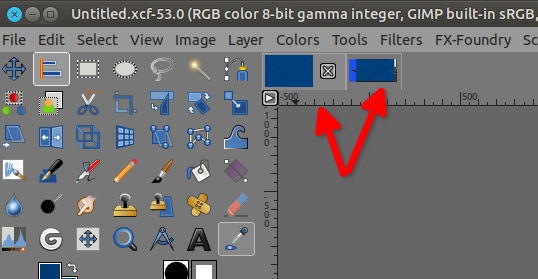
To change the color you need to pick it up for example on the original image (open it in GIMP as well, a second tab will open beside your first one, you can switch back and forth as desired

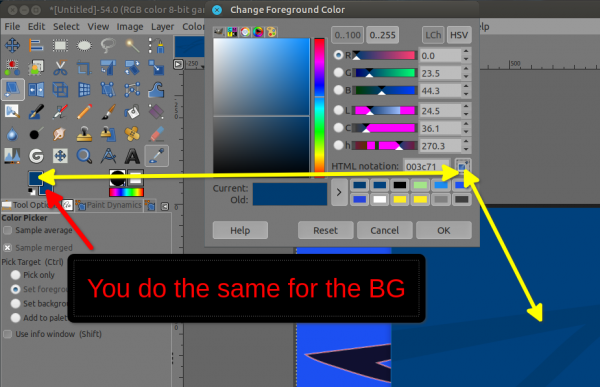
Now change the color of the FG and BG (ForeGround and BackGround) in GIMP (yellow arrow first), start by the FG ➤ click on the top little square, a window opens, click on the pipette and pick the color on your original image, then click OK on that window.
BG now ➤ Red arrow... click on the bottom square, and do the same as the FG.

Use the bucket fill tool for the BG or just drag and drop that BG square on your BG layer,
for the top layer ➤ click on it in the layer stack/dialog, (delete it if you use my xcf or you will have fringes) and create a new transparent layer ➤ then go to Edit ➤ Fill Path(even if you don't see the path it is here and selected because only one path) a window opens, select "solid color" (it will take the one on the FG)
Final result ➤
 Untitled.xcf.7z (Size: 64.83 KB / Downloads: 223)
No absolutely not
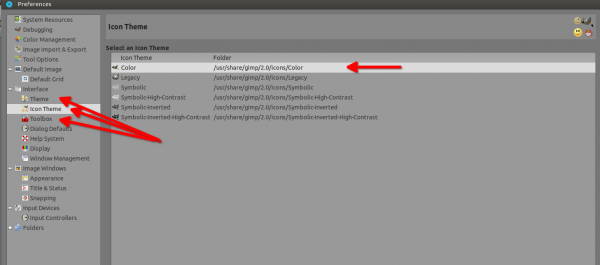
I changed the theme of my GIMP, go to Edit ➤ Preferences a window opens, and as usual follow the red arrows below, then click OK to confirm the changes

To remove it go to the Path tab (usually beside the layer tab) and untick the eye (once it's done, don't forget to click back on the layer tab to have it in focus)
To change the color you need to pick it up for example on the original image (open it in GIMP as well, a second tab will open beside your first one, you can switch back and forth as desired
Now change the color of the FG and BG (ForeGround and BackGround) in GIMP (yellow arrow first), start by the FG ➤ click on the top little square, a window opens, click on the pipette and pick the color on your original image, then click OK on that window.
BG now ➤ Red arrow... click on the bottom square, and do the same as the FG.
Use the bucket fill tool for the BG or just drag and drop that BG square on your BG layer,
for the top layer ➤ click on it in the layer stack/dialog, (delete it if you use my xcf or you will have fringes) and create a new transparent layer ➤ then go to Edit ➤ Fill Path(even if you don't see the path it is here and selected because only one path) a window opens, select "solid color" (it will take the one on the FG)
Final result ➤
 Untitled.xcf.7z (Size: 64.83 KB / Downloads: 223)
Quote:Could this be the reason, why I have a littlebit different view on my version of GiMP?
No absolutely not

I changed the theme of my GIMP, go to Edit ➤ Preferences a window opens, and as usual follow the red arrows below, then click OK to confirm the changes


