| Welcome, Guest |
You have to register before you can post on our site.
|
| Latest Threads |
How to fine-tune the ligh...
Forum: General questions
Last Post: denzjos
16 minutes ago
» Replies: 6
» Views: 207
|
Remove error created Temp...
Forum: General questions
Last Post: JB10
06-25-2026, 08:27 PM
» Replies: 5
» Views: 266
|
apply a certain gradient ...
Forum: General questions
Last Post: saint_m
06-25-2026, 05:22 PM
» Replies: 8
» Views: 1,415
|
Gimp 3.2.4 NO Color Theme...
Forum: General questions
Last Post: corawilliamlee
06-25-2026, 08:49 AM
» Replies: 1
» Views: 690
|
Most accurate way to colo...
Forum: General questions
Last Post: IndiePubber
06-25-2026, 06:58 AM
» Replies: 8
» Views: 724
|
Theming 3.2 ( in my case ...
Forum: Installation and usage
Last Post: bluedxca93
06-24-2026, 01:24 PM
» Replies: 6
» Views: 389
|
How would I be able to be...
Forum: General questions
Last Post: sallyanne
06-24-2026, 12:29 PM
» Replies: 5
» Views: 324
|
Color picker doesn't refl...
Forum: General questions
Last Post: CmykStudent_
06-23-2026, 07:20 PM
» Replies: 6
» Views: 1,598
|
gimp removes transparency...
Forum: General questions
Last Post: saint_m
06-23-2026, 12:48 PM
» Replies: 5
» Views: 8,622
|
Converting python plugin-...
Forum: Gimp 2.99 & Gimp 3.0
Last Post: DerPit
06-23-2026, 09:36 AM
» Replies: 67
» Views: 58,677
|
|
|
| Surface Laptop Studio pen not working |
|
Posted by: CubeGamer647 - 11-17-2022, 04:27 PM - Forum: General questions
- Replies (1)
|
 |
So I recently got a surface laptop studio and the pen to go with it, it's a touchscreen and it's specifically designed for drawing, but it would seem that gimp can't distinguish the pen from the cursor, and thus it's not detecting any pressure, nor does the other side function as a second pen. Any way to fix this?
|

|
|
| First time with Gimp and drawing tablet |
|
Posted by: PixelSystem - 11-17-2022, 02:18 PM - Forum: General questions
- Replies (1)
|
|
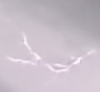
Hello,
I am trying to get a XP PEN Deco 01 v2 to work with gimp on win10. I have downloaded and installed their drivers. However when ever I put the pen to the tablet in gimp it switches from the pencil tool to something that gives the attached image. I have no idea what is going on. (also please feel free to recommend any configurations as I am new to art with a drawing tablet. I tried doing traditional but I find digital a lot easier for me)
https://imgur.com/a/NDLbVSD for the image
|
|
|
|
| Painting |
|
Posted by: sallyanne - 11-17-2022, 01:32 AM - Forum: General questions
- Replies (2)
|
 |
I have had this problem for awhile now and thought I may have been able to see what the problem is so didn't post about it before.
Whenever I paint I rarely get a full 100% opaque mark with just one stamp. I have made sure my opacity is 100% Hardness & force also I have at 100%. I am wondering could it be my dynamics?
Maybe it is the brush? Although I do not always use this brush. I have noticed this with other brushes as well. My brush and size are still set from some healing/cloning I was doing.
[attachment=9023]
|
|
|
|
| G'MIC Mandelbrot Filter Error (Re-Edited) |
|
Posted by: pypedreams - 11-16-2022, 05:55 PM - Forum: General questions
- Replies (4)
|
|
Hi Everyone,
I recently posted a problem with G'MIC and kept it brief, but haven't found a way to resolve the filter error. Below is more
detailed description.
While using the G’MIC Mandelbrot / Julia filter, my wireless mouse seemed to randomly change the filter settings, I simply turned it off and on again which fixed that problem, but when clicking OK I now receive this message:
“Error in ./fx_mandelbrot/ *** Command ‘input’: File ‘0’, format does not take any input options (options ‘0’ specified).”
The mouse definitely created the fault, could someone please help.
Thanks
|
|
|
|
| tiny bug in 2.99.15 should it be reported? |
|
Posted by: MichaJo - 11-15-2022, 09:28 PM - Forum: Gimp 2.99 & Gimp 3.0
- Replies (3)
|
|
Last time i've reported a bug was in bugzilla as far as i remember...
Here's a little tiny bug in the development version 2.99.15 and i'm not sure if it should be reported and if so where an how...
Selecting layers step by step holding the shift-key starting from the uppermost layer downwards selects only two layers.
As soon as you select a third layer the first selected layer will be deselected.
Doing the same from the lowest layer upwards works correctly as expected.
Michael
|
|
|
|
| G'MIC Mandelbrot Filter Error |
|
Posted by: pypedreams - 11-15-2022, 07:00 PM - Forum: General questions
- Replies (2)
|
|
Hello Everyone,
While using the G'MIC Mandelbrot / Julia filter I now receive this message when clicking OK "Error in ./fx_mandelbrot/ *** Command 'input': File '0', format does not take any input options (options '0' specified)." could someone please help me resolve the issue.
Thanks
|
|
|
|
|
